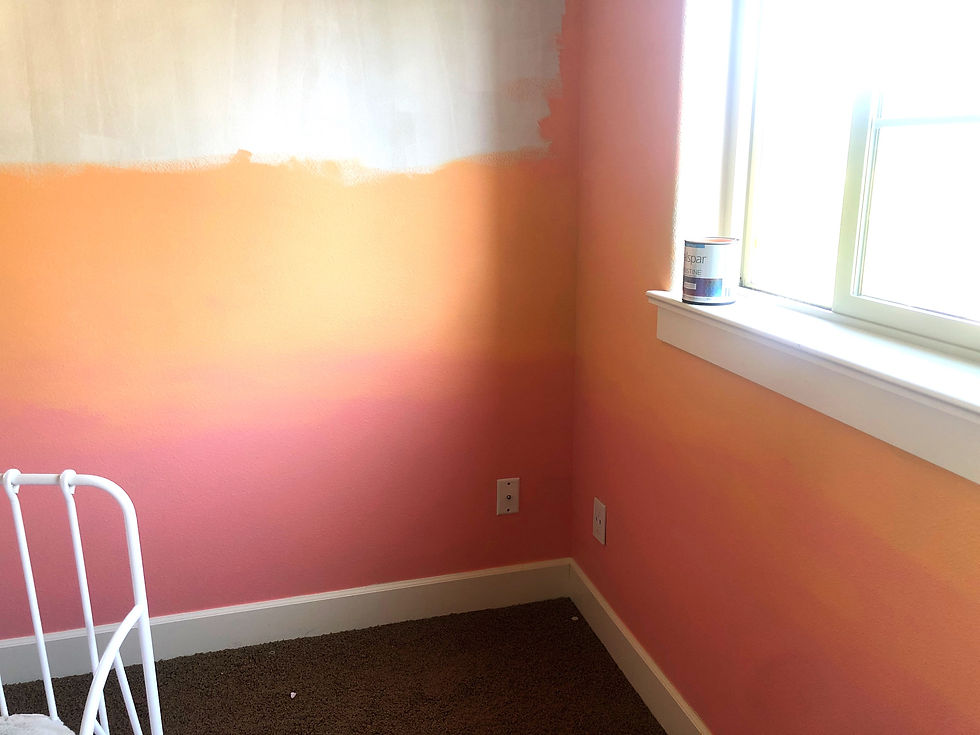
My nearly five-year-old daughter spent her first week of summer with her grandparents. This gave us the perfect opportunity to surprise her with painting her walls a 'rainbow sunset'. We were able to achieve this look for under $100!

Paint is always more expensive than you think - but it is also a very inexpensive way to transform a room. I selected Valspar paint to stay on budget. We've used Magnolia paint in the past, but were pleasantly surprised with Valspar.
We purchased 32 fl. oz. sized paint in the following colors :
Pouty Pink
Sweet Orange
Tropical Paradise
In the Shallows
Setting Sail

The walls were all a beige color, so I decided to prime the walls first. If you aren't great with paint, I would recommend you tape your walls, baseboards, and windows. I was feeling really confident, and I was trying to finish the priming before my toddler woke up from a nap, so I skipped the tape. We don't love our carpets, and hope to replace them once the kids get a little bigger - so I didn't care if I dripped a little bit here and there. If you love your carpets...put a cloth down. This project can be messy!

I started with the Pouty Pink color, and used the brush to cut in. The other two walls in her room are Magnolia Heirloom Yellow - and I liked how the brightness of the Pouty Pink was balanced with the yellow. My daughter has a very vibrant personality, so I know she will love it. I would recommend to speed up on time to use a roller for the initial coat, then go through with the brush to achieve the 'stroke' texture. Make sure you finish the strokes horizontally so everything looks consistent - and almost like wallpaper!

Blending is where it becomes tricky. Paint the entire first color on the first 1/5 of the wall, then go back and work in sections. Using the same brush, I alternated between the Pouty Pink and Sweet Orange colors. After I completed the Sweet Orange, I moved to Tropical Paradise. I was loving this look! Then...came...the...blue. This was when I had a slight regret to the project. My arms were tired, my toddler had woken up from nap time and "wanted to help", my husband seriously questioned my decision to add blue. Times were tough. However, I took a break, had a snack, and came back to the room. If I hadn't kept the blue, it would have been 'too' pink. The blending of the pink to blue does take a few coats. I do recommend taking a few breaks, step out of the room, then come back.
Because you are using the same brush, make sure you keep it wet in a paper towel during breaks. I did find the Valspar paint dries faster than our usual Magnolia paint. This was great for our toddler that kept coming into the room, but took some perseverance with blending.
Here was the end result :

I recommend going to your local hardware store for the best service when purchasing paint. I worked with our favorite local store (shoutout Jerrys!) for the best base for our budget. Again, paint can be sneaky expensive - so I recommend working with a trusted store to keep in budget. If you are painting a smaller wall, ask about sample sizes.
Supplies
If you have more time to source supplies, this kit would be perfect and allow you to stay under the $100 budget. Here is a great drop cloth that would also keep you under budget. If tape is on your list, I would recommend a skinnier tape - this allows for more control than the bulky thick tape.
Once you complete your wall(s), step back and make any additional adjustments. Once you feel good about it, cheers yourself and enjoy the sunset!
This post contains links that upon purchasing has potential to earn commissions.

Comments